Sunday, December 6, 2009

Shape Pictures


To help my younger children practice drawing simple shapes I made up some very simple drawings of familiar objects using the most basic of shapes. This is a fun way of sneaking prewriting practice to a disinterested toddler.

Materials Needed:

- Shape Pictures (See mine or make up your own. Please don’t make fun of mine-I imagined and created all of these in one night using ‘Paint’, which is not the most advanced software) :P

- Plain White Paper

- Pencils

- Colored Pencils or crayons

1. Let the Student pick out a shape picture to draw

2. Working beside the student (on your own paper, or course) show student how to draw the picture, one shape at a time. If the student gets frustrated (toddlers are like that) use hand over hand to help student make her shapes. This is practice, not perfect.

3. Now for the fun part! Let your imaginations loose and decorate your shape pictures in any way you wish. (yes, make your own-it is fun) Everyone’s are different and children will enjoy this part so much they will beg you to do another picture. Enjoy!

Wednesday, December 2, 2009

Funny Bird People


One day while drawing a pig in our lessons, my sweet four year old became quite frustrated that her drawing didn’t look like what she had envisioned. A scribbling, screaming, crying fit ensued, a fit that you would have to know my daughter Jasmine to fully comprehend. An obstacle or an opportunity? I chose opportunity.

I created a whimsical art project where we created our own bird creatures out of basic lines and shapes, which could be neither right nor wrong in nature. I also very cleverly included a variety of subjects and it was quite an enjoyable way to began our study on birds (and a useful way to use up the bag of feathers I had bought for a science experiment that week)

Materials Needed:

For each student:

One 5 ½ x 8 ½ sheet of card paper (half a sheet)

At least one 5 x 8 sheet of white paper (for the drawing itself)

Black Marker

A list simple drawings to choose beaks and feet from (see mine, or use your own)

Glue

Feathers-the kind you buy in a bag and never know what to do with. 

Goggly Eyes

Optional Materials:

A book about different kinds of birds


1. Look over the book of birds together with your children, remarking on the different beaks and feet each bird has and what they use them for (examples: birds of prey have hooked bills, seed eating birds have shorter bills, ducks have webbed feet to help them swim, and flamingos have long long legs to help them wade through water)

2. Show students the simple beak and feet drawings and have them pick out what their Funny Bird People will have. Help them draw the beaks, then a simple body (short, long, skinny, fat) and legs. (they can add wings if they want-they will mostly be covered with feathers) I did not even have them draw a head, as even this would complicate things-they are supposed to be goofy looking

3. Use a good bit of glue to put silly goggly eyes above the beaks and colored feathers on the wings.

4. Have the student make up a name for their Funny Bird People and a short story about them. Have them write the story inside the folded card. Some questions to get them going: What does your bird like to eat? Where does your bird live? What does your bird like to do? My children are younger so I wrote their stories out while they told them, and they were very very goofy.

5. When finished writing, glue the picture they made to the front of the card, and now they have a Funny Bird Person book which they will proudly display on their wall and make you read over and over and over again… Enjoy!

I have a feeling this craft, in different forms, will be made over and over again-it really is that fun!

Monday, November 23, 2009

Leaf Rubbing Paintings


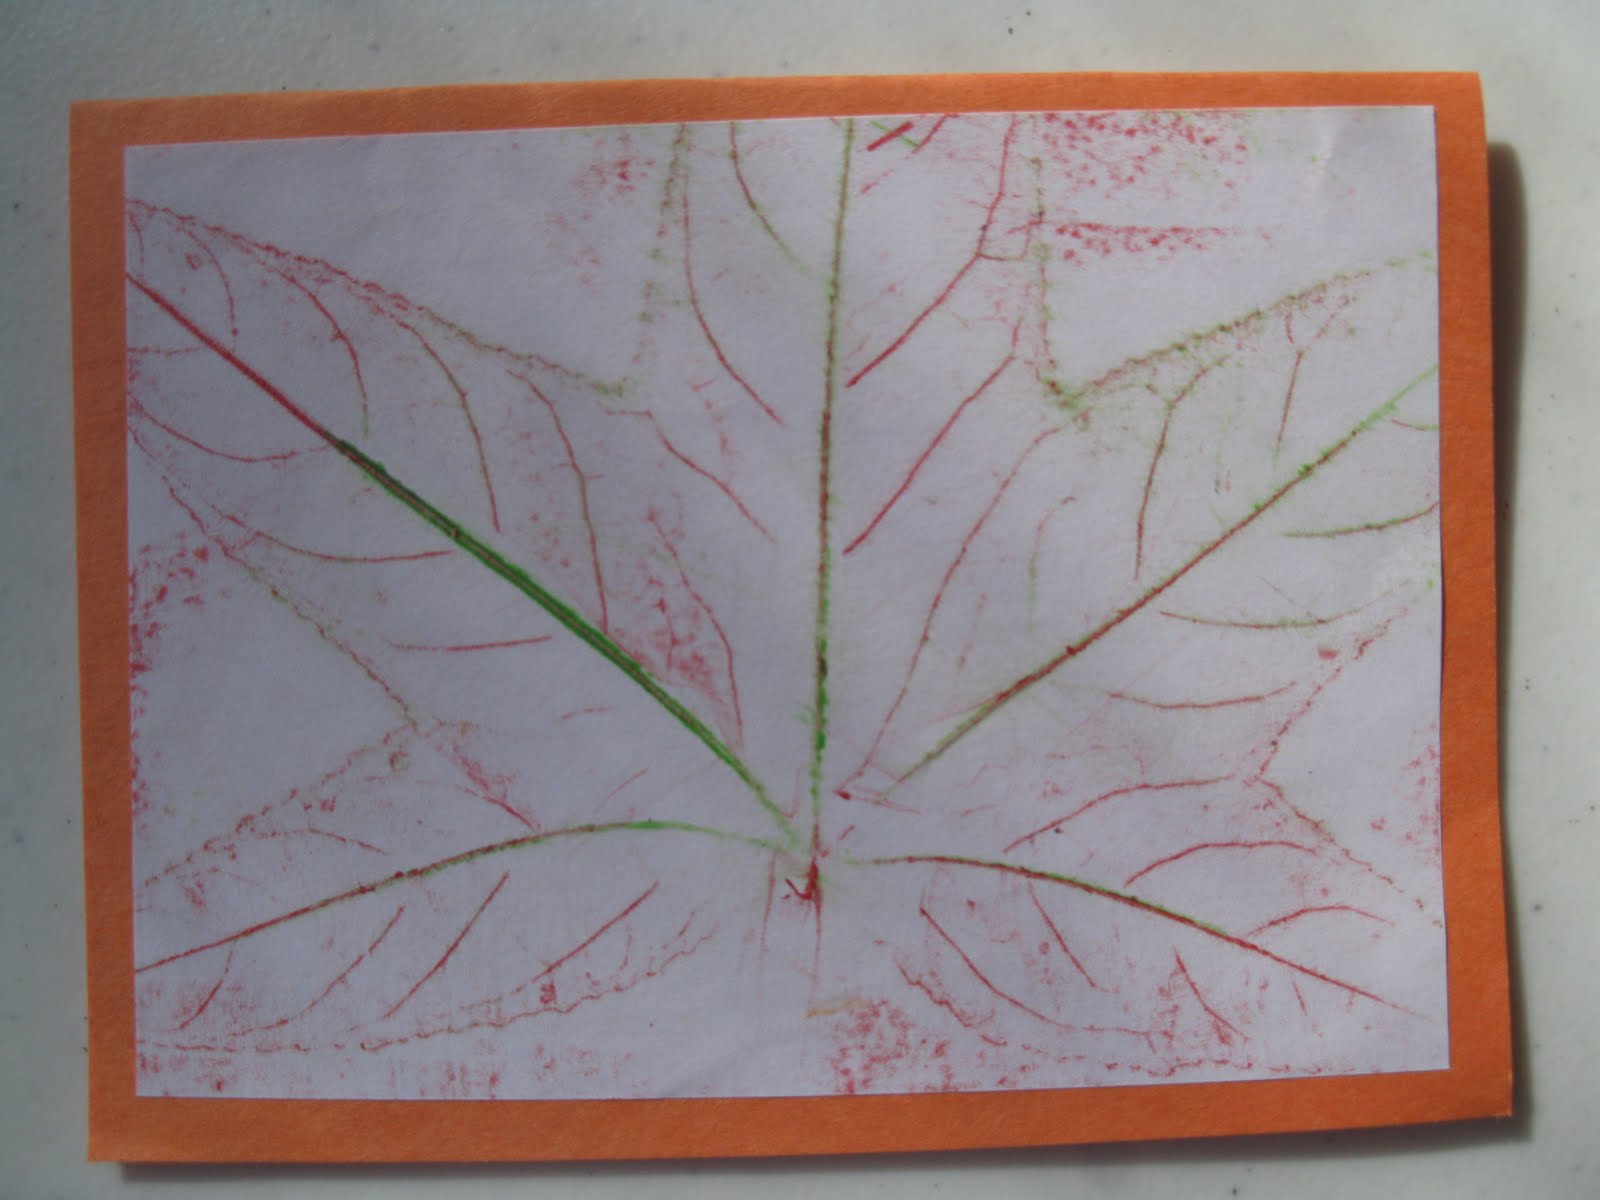
These simply beautiful leaf rubbing paintings are surprisingly easy. An afterthought of our Thanksgiving Leaf Cards, this is a great example of how you can take one art project and expand on it to make something unforgettable.


Materials Needed:

-Leaves (dried or fresh)

- white crayon, paper removed (I figured nonwashable crayons would make more sense for this one, but I’m sure washable would work as well)

-plain white paper

-watercolor paints

-glass of water, and paintbrushes (I found the round foam brushes, called a stippler, worked just beautifully with this project and would even recommend a trip to the store to find some-I found a pack of twenty different kinds of paintbrushes for $5 at Walmart, and they last for ages)

- Wipes or paper towels for cleanup

1. Using white paper and white crayon, follow directions from my Thanksgiving Leaf Card blog to make leaf rubbings. You will, obviously, not see the white crayon on the paper, but do make sure to really press down with the crayon and get the edges of the leaves, for you need a thickish layer of crayon for this to work perfectly.

2. With watercolor paints, paint on top of the crayon rubbing. You’re children will think you quite clever when the invisible leaf rubbing magically appears in white with the paint color surrounding it. (which is, of course, because the wax in the crayon repels the water based paint-can this be considered science class?)  Now, a few notes on technique:

- Painting directly on the leaf rubbings with a regular paintbrush worked, but was not very inspiring, kind of sloppy looking. I used (as noted above) the round foam paintbrushes used for stenciling-they are wonderful for all sorts of projects and quite fun to use. (You could, probably, use a rag or paper towel dipped in the paint for a similar effect, but I do not think it would look as good)

- To use the stippler (as the brushes are called, apparently, I looked it up in case anyone was confused) dip it in the watercolor paint, and pounce it up and down, instead of rubbing back and forth like a regular paintbrush. It is just lovely. I found that the effect was somewhat lost if the paint was too wet, so if it is, simply pounce onto a paper towel a few times before your paper and it will work perfectly.

3. Enjoy your creations, play with the paint, and let your students help you clean up.

Saturday, November 21, 2009

Thanksgiving Leaf Cards


Using leaves, some paper, and your imagination, you and your children can make beautiful cards for Thanksgiving, or any day. This is a wonderful way to remind children to be thankful for all the people in their lives.

Materials Needed:

- Leaves (dried or fresh)

- 6 x 9 inch piece of cardstock or construction paper, for each card made

- 5 ½ x 4 inch piece of regular white paper, for each card

- Crayons, papers removed (we used natural colors, such as red, orange, yellow, green, and brown)

- Glue sticks

- Book (to place on top of cards while drying so that they dry flat)

- Invitation Envelopes, if you are mailing

1. Cut all papers to size and fold construction paper in half to make base for the card.

2. Have STUDENT place leaf, spine up, on table. Place white paper on top of leaf. Being quite certain to hold leaf and paper in place with one hand (my kids needed help with this) rub back and forth on paper with the long side of your unwrapped crayon. For the best details, firmly place crayon parallel to the spine on each leaf, and rub outwards towards the edge.

3. Have STUDENT glue the back of the finished white papers and adhere to the front of your folded piece of construction paper to make a card.

4. Place cards under a book to dry, so that they will dry flat

5. Have STUDENT help clean up

6. Address and mail those cards! (I am always late with this step!)

Thursday, November 19, 2009

Pepper Stamping


Who hasn’t eyed a pepper while making dinner and thought ‘That looks like a Violet’? What a fun way to play with your food!

Materials Needed:

-Pepper, sliced crossways so that the outline is of….a violet. Leave white inside bit intact.

-Washable paints

-Paint brushes, preferably the foam flat kind, but any will do

-Paper for background (I used colored card stock) plus extras for fun

-Wipes or washcloths for clean up

Optional: Pictures of violets (Google image search is just fine)


1. Look at pictures of violets together with your students

2. Have STUDENT apply thin layer of paint on exposed edges of pepper with a paintbrush

3. Slowly stamp pepper onto paper and lift straight up. Be amazed at God’s glory.

4. Have student add whatever details they want, a stem, some leaves, a flower center, colored flower petals, a sun, clouds, butterflies. It really is a fun easy craft 

5. Have your children help you clean up.

Monday, November 16, 2009

Color Unit Activities for Young Children

 
I love unit activities when the whole family gets to participate! This is how I included my younger children into our study on colors.

Some Ideas to try:

1. Print color flash cards on card stock. (I found mine at: http://www.ziggityzoom.com/activities.php?a=173 I liked these because the animals are very cute and they have the colors written so my oldest can learn the color sight words.) Have the children take turns picking out a color, naming it, and finding something in the room that is that color. (they enjoy this more than you might think!)

2. For your early readers: Make your own flash cards, using two cards for every color. Write the name of the color on one 3x5 card and color a circle on the second in that color. Play a matching game with the cards face up, and as the child gets very good at sight reading the words, flip the cards over and play a memory game.

3. Print out a simple color by number (I found mine at: http://www.makinglearningfun.com/themepages/TurkeyColorByNumber.htm I liked this because it is very simple and had many colors listed without the actual color on them so you have to read it. Also, it is almost Thanksgiving) Have the STUDENT read the color and find the appropriate number-does this count for math?

4. Have child pick out a color of their choice. Find pictures of that color in old magazines and cut them out, pasting them on a piece of cardstock for a color poster.

Thursday, November 12, 2009

Paper Rainbow


This is a fun project to teach children how to measure using a ruler, and how to put colors in rainbow order.

Materials Needed:
1 “ wide strips of construction paper in: Red, Orange, Yellow, Green, Blue and Purple
Pencil
Ruler
Scissors
Stapler
Optional:
Paper for background/extra paintings
Washable paints
Paintbrushes
Glue
Wipes/Washcloths for cleanup
Light book (to weight down rainbow while it dries onto paper)

1. Have STUDENT measure and mark the following lengths in paper: Red:10 inch, Orange: 9 inch, Yellow 8 inch, Green 7 inch, Blue 6inch, and Purple 5 inch
2. Have STUDENT cut rainbow strips on measured line
3. Show student how to stack colors in rainbow order
4. Help student staple edges of paper strips together on both ends, folding the second end into an arch to complete

Optional:
1. Have student paint the background paper with the washable paints. You may wish to use only blues and whites with your students, but I let my children choose whatever design and colors they want. That’s what makes it art instead of an assignment
2. Brush white glue on an area about the size of the rainbow on your background paper. Lay rainbow on top of glue, and weight down with light weight (book) making sure it does not crush the rainbow
3. Have the STUDENT help clean up-wash paintbrushes and table after they are done

PS-Can’t stand throwing away those pretty rainbow paper scraps? Me neither-some ideas: Mix them up and have student arrange them from smallest to largest (hint:it will be in rainbow order) OR have student cut up the rainbow pieces. On seperate sheet of paper, use gluestick to write out a number or letter you are working on. Have student stick rainbow papers to the glue in shapes of the letter, creating a kinethetic learning experience!